
Poly-gel Nails: The Complete Guide to Stunning, Long-Lasting Nails
Poly-gel nails are a progressive choice in the realm of nail improvements, joining the best of acrylic and gel frameworks. Known for their adaptability, lightweight feel, and convenience, Poly-gel nails have in no time turned into a go-to decision for nail fans and experts the same. In this article, we'll plunge into all that you really want to be familiar with Poly-gel nails, including what they are, the means by which they're applied, their advantages, and how to really focus on them.
What Are Poly-gel Nails?
Dissimilar to conventional nail frameworks, Poly-gel arrives in a cylinder and has a clay like consistency. This makes it more straightforward to form and shape without the requirement for blending powders and fluids. The outcome is a lightweight and regular looking nail improvement that is serious areas of strength for both simple to work with.
Poly-gel is applied utilizing a brush and slip arrangement, which keeps the item from adhering to the brush. In the wake of forming, the nails are restored under an UV or Drove light to solidify, making a smooth and strong completion.
Advantages of Poly-gel Nails
Lightweight and Agreeable: Poly-gel nails are known for their lightweight feel, making them more agreeable to wear contrasted with customary acrylics.
Normal Look: They have a characteristic, polished finish, so they're ideally suited for clients who need upgrades that imitate genuine nails.
Scent Free Application: Dissimilar to acrylic nails, which can have areas of strength for a smell, Poly-gel is sans smell, giving a more lovely encounter.
Adaptable and Sturdy: Poly-gel is less inclined to break or break because of its adaptability, pursuing it an optimal decision for individuals with dynamic ways of life.
Adjustable and Adaptable: You can shape, stretch, or even shape plans with Poly-gel, making it flexible for different nail craftsmanship styles.
Poly-gel Nail Application Interaction
Planning: Clean and disinfect the nails, push back the fingernail skin, and eliminate any abundance oils by daintily polishing the outer layer of the nails.
Applying the Poly-gel: Press a limited quantity of Poly-gel from the cylinder onto the nail or nail structure. Utilize a brush plunged in slip answer for shape and shape the item into the ideal structure.
Relieving the Nails: When the Poly-gel is molded, fix each nail under an UV or Drove light. The restoring time might differ relying upon the light, so adhere to the item guidelines for best outcomes.
Forming and Documenting: In the wake of restoring, record the nails to refine the shape, and utilize a support to streamline any unpleasant spots.
Adding Final details: When the nails are formed and smoothed, apply a top coat and fix again to seal in the look. Get done with fingernail skin oil to keep the skin around the nails hydrated.
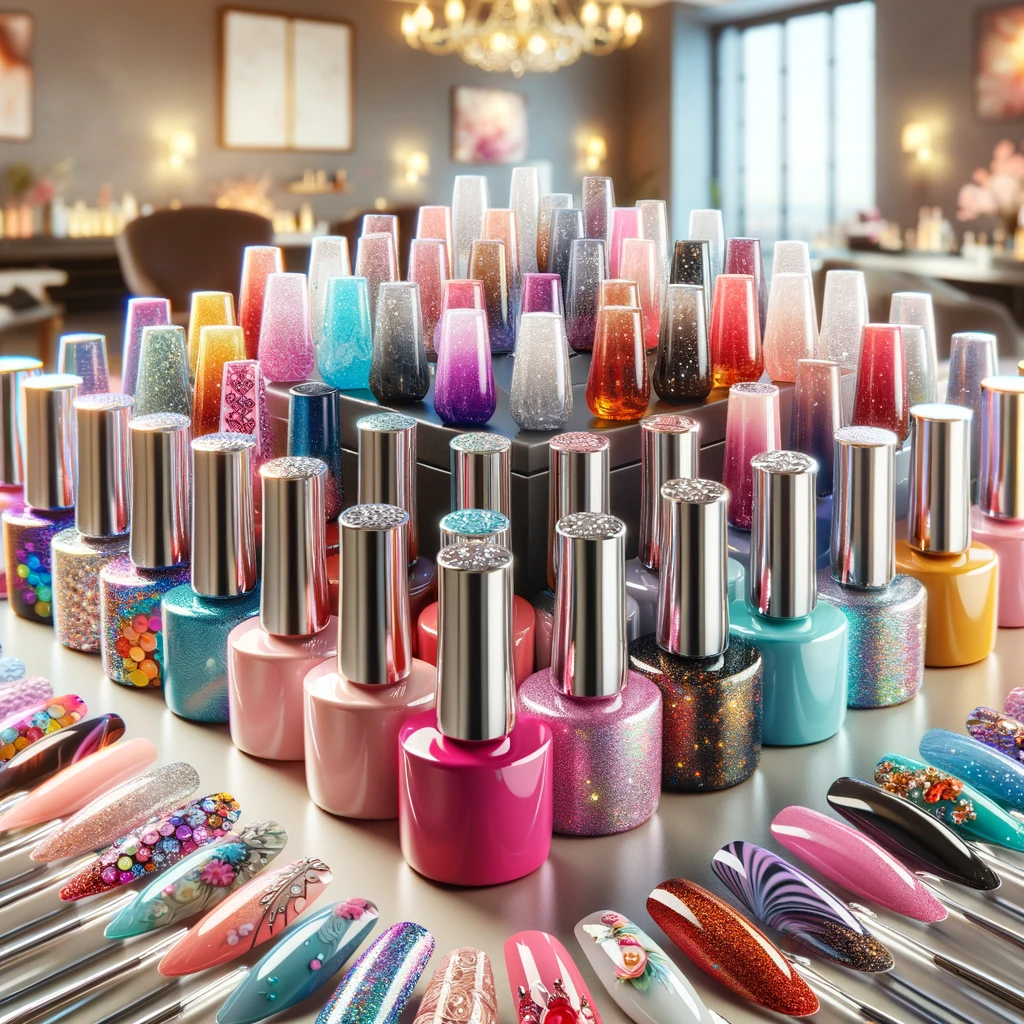
Well known Poly-gel Nail Plans and Styles
Exemplary French Tips: Poly-gel's adaptability considers flawlessly etched French tips that are tough and trendy.
Ombre Impact: Mix two tones for a slope impact that is not difficult to accomplish with Poly-gel's smooth application.
Exemplified Plans: Add little bits of sparkle, jewels, or different plans inside the Poly-gel for an embodied look that is both extraordinary and staggering.
Marble Examples: Utilize various shades of Poly-gel to make a marble impact, a well known and refined style for nail upgrades.

Instructions to Really focus on Poly-gel Nails
Keep away from Unreasonable Dampness: While Poly-gel nails are sturdy, delayed openness to water can debilitate them over the long run. Wear gloves while doing family errands.
Standard Final details: As your regular nails develop, you'll have to fill nearby close to the fingernail skin to keep a consistent look. Ordinarily, Poly-gel nails should be filled each half a month.
Use Fingernail skin Oil: Keeping your fingernail skin hydrated will forestall dryness and add a cleaned focus on your nails.
Try not to Involve Nails as Devices: Like any nail improvement, Poly-gel can break whenever exposed to an excess of power, so try not to utilize your nails to open bundles or containers.
Poly-gel nails are best eliminated by absorbing them CH3)2CO, which relax the item so it very well may be tenderly taken out without harming your normal nails. Here is a bit by bit evacuation process:
Splash a cotton ball in CH3)2CO and put it on the nail, then, at that point, enclose it by foil.
Allow the nails to douse for 10-15 minutes, then, at that point, delicately drive over the mellowed Poly-gel utilizing a fingernail skin pusher.
Buff and shape your normal nails after evacuation, and apply fingernail skin oil to reestablish dampness.
Often Got clarification on some pressing issues
Are Poly-gel nails better compared to acrylic?
While both have their advantages, Poly-gel is more adaptable and lightweight, making it less inclined to breakage and more agreeable to wear than acrylic.
How long do Poly-gel nails last?
Poly-gel nails can endure as long as three weeks or more with legitimate consideration and support.
Could I at any point apply Poly-gel nails at home?
Indeed, yet you'll require the legitimate devices, including an UV or Drove light, slip arrangement, and a Poly-gel unit. Following an instructional exercise or rehearsing on a couple of nails can assist you with accomplishing salon-quality outcomes at home.
End
Poly-gel nails are a fantastic decision for anybody hoping to accomplish solid, lightweight, and shocking nail upgrades. Their simplicity of use, joined with perpetual plan prospects, makes them a number one among nail lovers. Whether you love exemplary plans or strong, imaginative styles, Poly-gel nails give a flexible material to self-articulation.
0 Comments